Showing posts with label Crafts. Show all posts

Thursday, July 7, 2011

Sun Catcher Re-Purposed Jar Project

A lot of projects I have done for summer school have been the result of wanting/needing to use up materials we already had on hand, or items I ask for in my parent letter I send home at the beginning of summer school (items like paper towel tubes, bags of beans & rice & noodles, old puzzle pieces, old CDs, baby food jars, etc).

The project below was made from baby food jars. I call it a Sun-Catcher jar, because they look really pretty in a sunny window - kind of like stained glass.

The kids and I talk about how we can use lots of items from our homes for art projects, instead of just throwing stuff away. You should see all the teeny-tiny bits of construction paper that they've been saving in our scrap bin since then... I guess our little conversation worked, lol!

Here are some of the uses the kids and I thought of for these cute little jars:
  • Desk organizers for Mom & Dad (for paper clips, etc)
  • School supply holder (pencils, crayons)
  • Money Jar
  • Candle Holder (we talked at length about this being an adult-only idea)
  • Super Secret Stuff Holder (lol again)
  • A pretty art piece
  • Toothbrush holder

Supplies Needed:
  • Baby food or other small jars (labels removed; lids not necessary)
  • Glue (watered down; see the clear cup in below photo)
  • Tissue paper
  • Small paint brushes
  • Wax Paper, if you have it

Instructions:
  1. Take labels off of washed jars. Last year at summer school, the lids were hard to decorate, so this year I just recycled them.
  2. Cut several colors of tissue paper into small squares. For the tissue paper, I told the kids it doesn't have to be brand new tissue. I explained how I save the tissue paper from presents I get, and either re-use it for a gift I give, or use the tissue for art projects.
  3. Mix a small amount of glue with equal amount of water to make the "decoupage" glue.
  4. You're ready to get started. Start by brushing a some of the decoupage glue onto the jar. Then add one piece of issue paper to the glue spot. Then brush another layer of the glue on top of the tissue paper. It's important to put glue on top the whole piece of tissue paper, not just part of it. Repeat this process for each piece of tissue paper you add.
  5. Do not add any glue or tissue paper to the bottom of the jar. It'll be a mess when it's dry! :-)
  6. Let dry over night. It's best if you cut a small piece of wax paper for the jar to dry on, so the pieces near the bottom don't get ripped up after it dries.


Octopus Fun!

...this project is supposed to be an octopus, however, I do understand it may resemble a jellyfish as well! :-) You can be the judge on what it looks more like.

Nonetheless, It'll spark good conversation with the kiddos about the attributes/characteristics of both ocean creatures! See posters below! (Click HERE for the freebie full size PDF download of these printable posters!)

Anyway .... onto the project!

Supplies Needed:


  • Regular full size construction paper (the kind that's 11x17ish or larger); at least 3 fun colors
  • Glue
  • Pencil for tracing/free drawing
  • Scissors
  • 2 wiggle/googley eyes per project
  • glitter
  • paper plate to catch excess glitter

Instructions:
  1. Create tracers for the body part of the octopus, if you think the kids will need them. Otherwise, the kids can free draw the body shape of their creature.
  2. Next, use a different color of paper to cut 8 strips of paper to make the tentacles (or more if they decide to make a jellyfish). It looks cute if they make tentacles out of different colors of paper. I gave the kids the choice to do what they wanted though.
  3. Once the strips are cut, show the kids how to fold paper accordion-style. Glue the tentacles onto the body.
  4. Now, decorate the body and the legs. Kids can use construction paper to cut and glue shapes to their creature, draw with markers, add two googley eyes, and apply glitter!


Some of the kids' projects:


Ice Cream Cones!

Summer is here ... which makes an ice cream cone project perfect!


Supplies Needed:
  • Brown & bright colored construction paper
  • Glue
  • Scissors
  • Pencils (to trace shapes)
  • Markers (to draw on "waffle" part of cone & to decorate ice cream)
  • Red or pink craft pom-poms or felt (to make a "cherry" on top)
  • White Glitter to make ice cream look "icy" (optional)
  • Real sprinkles (we used brown rice to make "chocolate" sprinkles!)
  • Cone and ice cream scoop tracers (you can make your own out of card board for the kids to trace to make the project easier!)
  • Separate paper plates to shake excess glitter and/or sprinkles onto

Directions:
  1. Have the kids select two colors of bright construction paper to use for the ice cream scoops. If you want to make more than two scoops, go for it! :-) Kids will also need to choose a brown shade of construction paper for the cone.
  2. Use tracers and a pencil to create the cone and scoop shapes on construction paper (or, kids can free draw them). You can make your own tracers out of card board for the kids to trace to make the project easier!
  3. Cut out cones and scoops and glue together. Some kids will need instruction on which part to glue first. Also remind the kids that the scallop part of the ice cream scoops faces downward ... otherwise you may end up with some "upside down ice cream cones!" :-)
  4. Next, the kids can draw on the "waffle" part of the cone with a brown marker. Also with markers, have the kids add details to their scoops.
  5. Then, use either a red/pink craft pom pom as a cherry & glue to the top of the ice cream cone. We ran out of pom poms this year at summer school, so we just used some red and pink felt we had laying around to cut circle "cherries."
  6. The last step is to add glitter and sprinkles! It's a good idea to model how much glue is needed for this part ... some kids will use GOBS of glue, others won't use enough. Modeling is ALWAYS a good thing! :-)
  7. Of course, let dry overnight!

Some more examples of our ice cream creations:


Mosaic Turtles

I LOVE this project. It's so simple and they turn out so very cute! See the bottom of this post for some great picture books that you could read before you get started on this project!


Supplies (per student):
  • 6 inch (or larger, if you want) white paper plate (turtle's "shell")
  • Varying shades of brown & green construction paper
  • Glue
  • Scissors
  • Pencil (for free drawing turtle's body parts)
  • Markers (to draw on the turtle's face)
  • 2 wiggle (or "googley") eyes


Instructions:
  1. Gather supplies.
  2. Rip up varying shades of green and brown construction paper - no larger than the size of a dime. These paper pieces will be the turtle's mosaic shell.
  3. Free draw and cut out 1 turtle head, 1 tail, and 4 feet from green construction paper. You may need to make master patterns out of cardboard if you have young students, as free drawing these parts may be hard for them)
  4. Begin adding the mosaic pieces to your turtle's "shell."
  5. Then, glue on the head, feet, and tail.
  6. Finally, glue on two wiggle eyes and use a marker to finish the turtle's face.

The mosaic pieces ready to go:

Examples of kids' turtle projects:

This turtle project was completed using a large paper plate (9 inches, I think):

I think it always adds something to the experience for kids if there is a story or another activity that accompanies a craft project. Here are some great picture and children's books about turtles:

"Sea Turtles" by Gail Gibbons


"Into the Sea" by Brenda Z. Guiberson

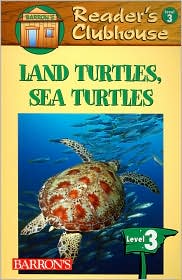
"Land Turtles, Sea Turtles" by Barron's Publishing